
Dash Insulator Manufacturing Process
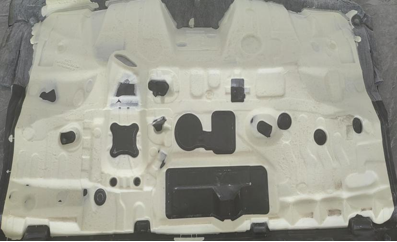
Required Tools:
- Needle Punching Machine
- Laminating Machine
- Curing Oven
- Hydraulic Press
- Foaming Machine
- Die Cutting Machine
Things Needed?
- Needle-Punched Nonwoven Fabric
- PAPE Film
- EVA (Ethylene-Vinyl Acetate)
- Polyurethane Foam
Product Manufacturing Process Flow
Step 1: Needle-Punched Nonwoven Production
Polyester or blended fibers are opened, carded, and cross-lapped, then repeatedly needled using a Needle Punching Machine to entangle the fibers into a three-dimensional network structure. This process imparts excellent air permeability, resilience, and acoustic absorption properties to the base material, laying a solid foundation for subsequent lamination and forming processes.
Step 2: PAPE Film Lamination
The PAPE composite film (PA/PE composite film) is uniformly laminated onto the surface of the needle-punched nonwoven fabric using a Laminating Machine. This film layer enhances surface strength and abrasion resistance, provides excellent moisture and oil repellency, and ensures dimensional stability during subsequent thermoforming processes – making the final sound insulator more durable and reliable.
Step 3: Curing Oven Heating
The laminated composite is fed into a Curing Oven and uniformly heated under precisely controlled temperature conditions. This heating process fully softens the fiber structure and activates the thermoplastic properties, providing ideal plasticity for subsequent hydraulic forming – ensuring uniform material flow and complete cavity filling during molding.
Step 4: Hydraulic Forming
The heated and softened material is quickly transferred to a Hydraulic Press and formed under high pressure using dedicated molding dies. Under the combined effect of heat and pressure, the material is precisely shaped to match the vehicle-specific dash insulator contour. This process ensures product consistency and dimensional accuracy while preserving the acoustic performance of the material.
Step 5: Polyurethane Foaming
Polyurethane foam components are injected into designated areas of the formed sound insulator, with density and thickness precisely controlled by a Foaming Machine. The polyurethane undergoes a chemical reaction and expands within the mold, forming a uniform microcellular foam structure that further enhances the product's sound insulation, sealing, and cushioning performance – meeting the complete vehicle NVH requirements.
Step 6: Die Cutting
The finished product is precisely placed into a Die Cutting Machine for edge trimming, removing excess flash and burrs. After precision cutting, the product achieves accurate dimensions with clean, smooth edges – meeting all assembly requirements. Finally, it undergoes stringent quality inspection before being packaged, warehoused, and delivered to the customer.
Wheel House Insulator Manufacturing Process
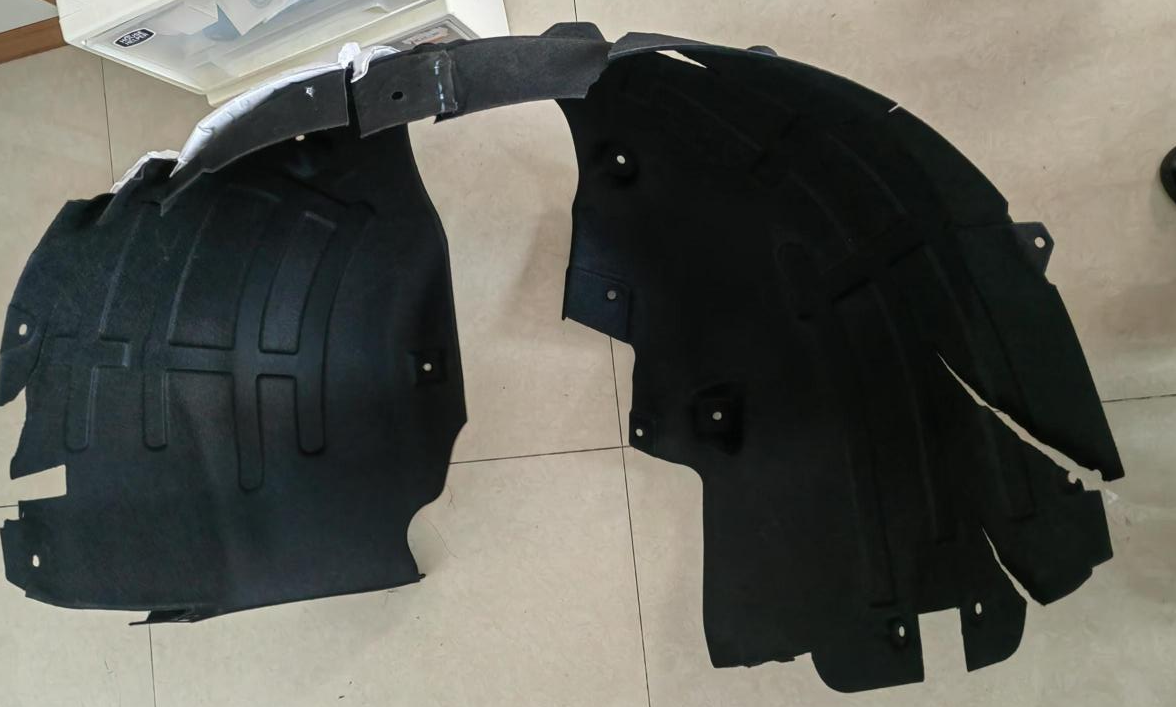
Required Tools:
- Needle Punching Machine
- Laminating Machine
- Curing Oven
- Hydraulic Press
- Foaming Machine
- Die Cutting Machine
Things Needed?
- Needle-Punched Nonwoven Fabric
- PAPE Film
- EVA (Ethylene-Vinyl Acetate)
- Polyurethane Foam
Product Manufacturing Process Flow
Step 1: Needle-Punched Nonwoven Production
Polyester or blended fibers are opened, carded, and cross-lapped, then repeatedly needled using a Needle Punching Machine to entangle the fibers into a three-dimensional network structure. This process imparts excellent air permeability, resilience, and acoustic absorption properties to the base material, laying a solid foundation for subsequent lamination and forming processes.
Step 2: PAPE Film Lamination
The PAPE composite film (PA/PE composite film) is uniformly laminated onto the surface of the needle-punched nonwoven fabric using a Laminating Machine. This film layer enhances surface strength and abrasion resistance, provides excellent moisture and oil repellency, and ensures dimensional stability during subsequent thermoforming processes – making the final sound insulator more durable and reliable.
Step 3: Curing Oven Heating
The laminated composite is fed into a Curing Oven and uniformly heated under precisely controlled temperature conditions. This heating process fully softens the fiber structure and activates the thermoplastic properties, providing ideal plasticity for subsequent hydraulic forming – ensuring uniform material flow and complete cavity filling during molding.
Step 4: Hydraulic Forming
The heated and softened material is quickly transferred to a Hydraulic Press and formed under high pressure using dedicated molding dies. Under the combined effect of heat and pressure, the material is precisely shaped to match the vehicle-specific dash insulator contour. This process ensures product consistency and dimensional accuracy while preserving the acoustic performance of the material.
Step 5: Polyurethane Foaming
Polyurethane foam components are injected into designated areas of the formed sound insulator, with density and thickness precisely controlled by a Foaming Machine. The polyurethane undergoes a chemical reaction and expands within the mold, forming a uniform microcellular foam structure that further enhances the product's sound insulation, sealing, and cushioning performance – meeting the complete vehicle NVH requirements.
Step 6: Die Cutting
The finished product is precisely placed into a Die Cutting Machine for edge trimming, removing excess flash and burrs. After precision cutting, the product achieves accurate dimensions with clean, smooth edges – meeting all assembly requirements. Finally, it undergoes stringent quality inspection before being packaged, warehoused, and delivered to the customer.
Engine Bay Insulator
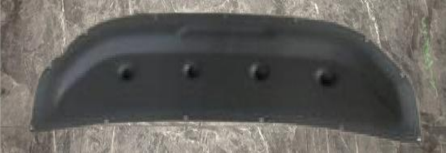
Required Tools:
- Nonwoven Fabric + Prepreg
- Fiberglass
- Lightweight Foam
Things Needed?
- Compression Molding Press
- Cooling Fixture
Product Manufacturing Process Flow
Step 1: Raw Material Hot Press Forming
The nonwoven fabric with prepreg, fiberglass, and lightweight foam are layered in sequence according to process specifications and placed into a Molding Press. Under controlled temperature and pressure, the materials undergo a curing reaction, bonding tightly into a pre-shaped product blank.
Step 2: Cooling Setting
The hot-formed product is quickly transferred to a Cooling Fixture for uniform cooling, which stabilizes the internal structure and prevents deformation or shrinkage – ensuring dimensional accuracy and shape stability.
Step 3: Quality Inspection
The cooled and set product undergoes comprehensive quality inspection, including appearance, dimensions, thickness, hardness, and surface quality – ensuring every piece meets customer drawings and technical specifications. Approved parts are cleaned, packaged, and warehoused for delivery.
Trunk Lid Manufacturing Process
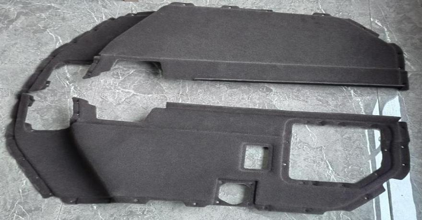
Required Tools:
- Heating Oven
- Hydraulic Press
- Die Cutting Machine
Things Needed?
- PP/Glass Fiber Board
- PAPE Film
Product Manufacturing Process Flow
Step 1:PP/Glass Fiber Board Heating
The PP/Glass Fiber Board is fed into a Curing Oven and uniformly heated under precisely controlled temperature conditions. The heating process fully softens the PP matrix to the ideal state for thermoplastic forming, preparing the material for subsequent hydraulic forming and ensuring uniform flow and complete cavity filling during molding.
Step 2: Hydraulic Forming
The heated and softened PP/Glass Fiber Board is quickly transferred to a Hydraulic Press and formed under high pressure using dedicated molding dies. Under the combined effect of heat and pressure, the material is precisely shaped to meet design specifications. The flocked fabric is simultaneously bonded to the surface, imparting excellent appearance and acoustic properties. This process ensures product consistency and dimensional accuracy.
Step 3: Die Cutting
The formed product is precisely placed into a Die Cutting Machine for edge trimming, removing excess flash and burrs. Mounting holes and locating features are cut according to customer drawings. After precision cutting, the product achieves accurate dimensions with clean, smooth edges – meeting all assembly requirements.
Step 4: Inspection
The die-cut product undergoes comprehensive quality inspection, including appearance, dimensions, thickness, surface quality, and mounting hole accuracy – ensuring every piece meets customer drawings and technical specifications. Approved parts are cleaned, packaged, and warehoused, ready for delivery to the customer.
Fender Insulator/Relief Valve Insulator
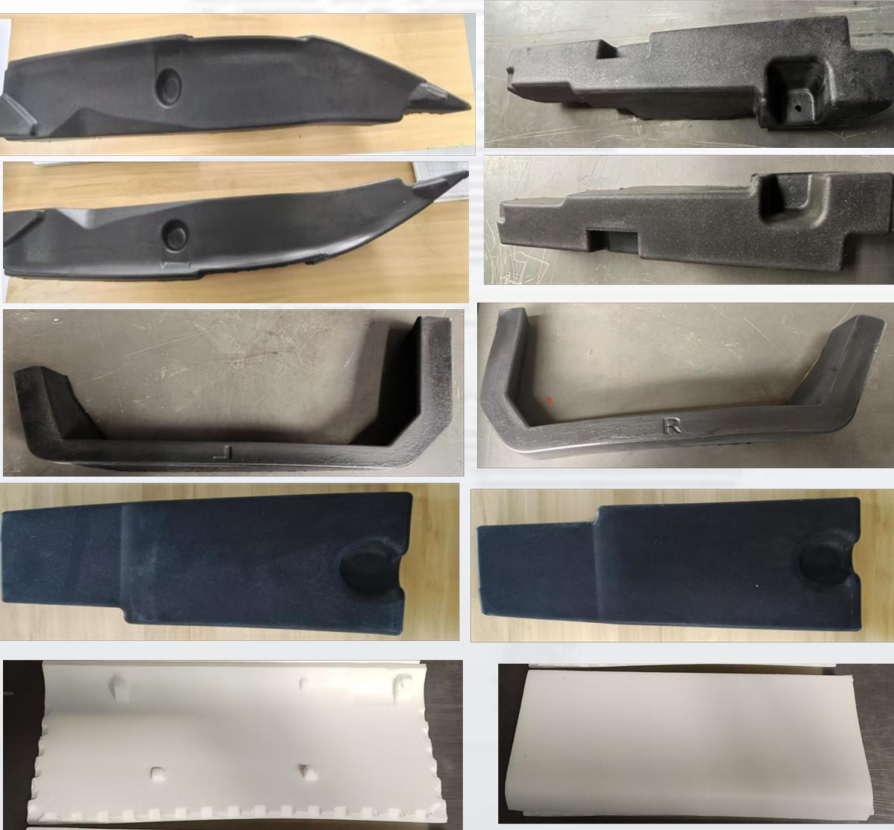
Required Tools:
- Foaming Machine
Things Needed?
- Polyurethane Component A
- Polyurethane Component B
Product Manufacturing Process Flow
Step 1: Raw Material Feeding and Mixing
Polyurethane Component A and Component B are independently fed through the precise metering system of the Foaming Machine, simultaneously delivered to the mixing head at the set ratio (typically 1:1 or specific formulation). Under high pressure, the two components are rapidly and uniformly mixed in the mixing chamber, initiating the polymerization reaction. The Foaming Machine precisely controls the flow rate, temperature, and pressure of each component, ensuring consistent and stable mixing quality.
Step 2: Injection Foaming
The uniformly mixed liquid polyurethane material is metered into the mold cavity through the Foaming Machine. Upon injection, the polyurethane rapidly reacts and expands within the mold, uniformly filling the entire cavity and forming a microcellular foam structure with excellent vibration damping, sound absorption, and sealing performance. Foam density and thickness are precisely controlled by injection volume and mold design.
Step 3: Shape Trimming
The foamed product is demolded and trimmed to remove excess flash, overflow material, and irregular edges according to product specifications. Specialized cutting tools or die-cutting equipment are used to ensure a neat shape and accurate dimensions while maintaining the integrity of the foam structure – preserving its acoustic and physical properties.
Step 4: Quality Inspection
The cooled and set product undergoes comprehensive quality inspection, including appearance, dimensions, thickness, hardness, and surface quality – ensuring every piece meets customer drawings and technical specifications. Approved parts are cleaned, packaged, and warehoused for delivery.
Battery Insulation Sheet Manufacturing Process
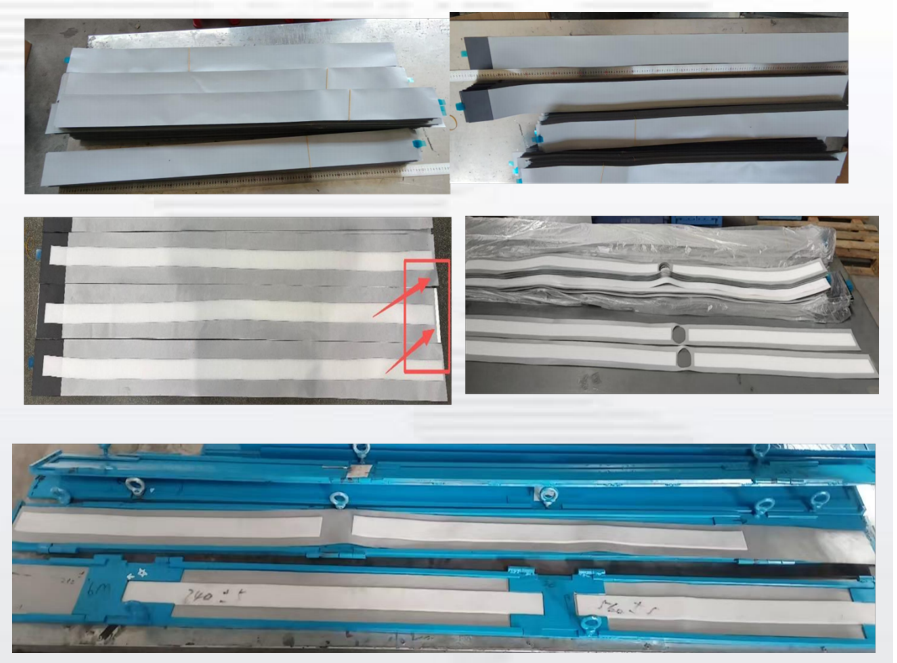
Required Tools:
- Automatic Cutting Machine
Things Needed?
- Ceramic Silicone Sheet
- Polycarbonate (PC)
- Melamine Foam
Product Manufacturing Process Flow
Step 1:Raw Material Cutting and Processing
The raw materials – Ceramic Silicone Sheet, Polycarbonate (PC) Sheet, and Melamine Foam – are precisely cut to design specifications using an Automatic Cutting Machine. Equipped with a high-precision CNC system, the machine ensures accurate dimensions and clean, burr-free edges – providing precisely sized and clean sheets for subsequent lamination processes.
Step 2: PC Sheet Lamination
The cut PC sheet is securely laminated onto one side of the Ceramic Silicone Sheet using a specialized lamination process (such as hot pressing or adhesive bonding). The PC layer imparts excellent impact resistance and dimensional stability while maintaining good temperature resistance – effectively enhancing the mechanical strength and durability of the final product.
Step 3: Melamine Foam Lamination
The cut Melamine Foam is laminated onto the opposite side of the Ceramic Silicone Sheet. Melamine Foam offers excellent sound absorption and flame-retardant properties, effectively damping mid-to-high frequency noise while improving fire safety. The three-layer composite forms an integrated structure after lamination, combining thermal insulation, mechanical reinforcement, and acoustic absorption in a single material.
Step 4: Inspection
The die-cut product undergoes comprehensive quality inspection, including appearance, dimensions, thickness, surface quality, and mounting hole accuracy – ensuring every piece meets customer drawings and technical specifications. Approved parts are cleaned, packaged, and warehoused, ready for delivery to the customer.
Engine Bay Heat Shield
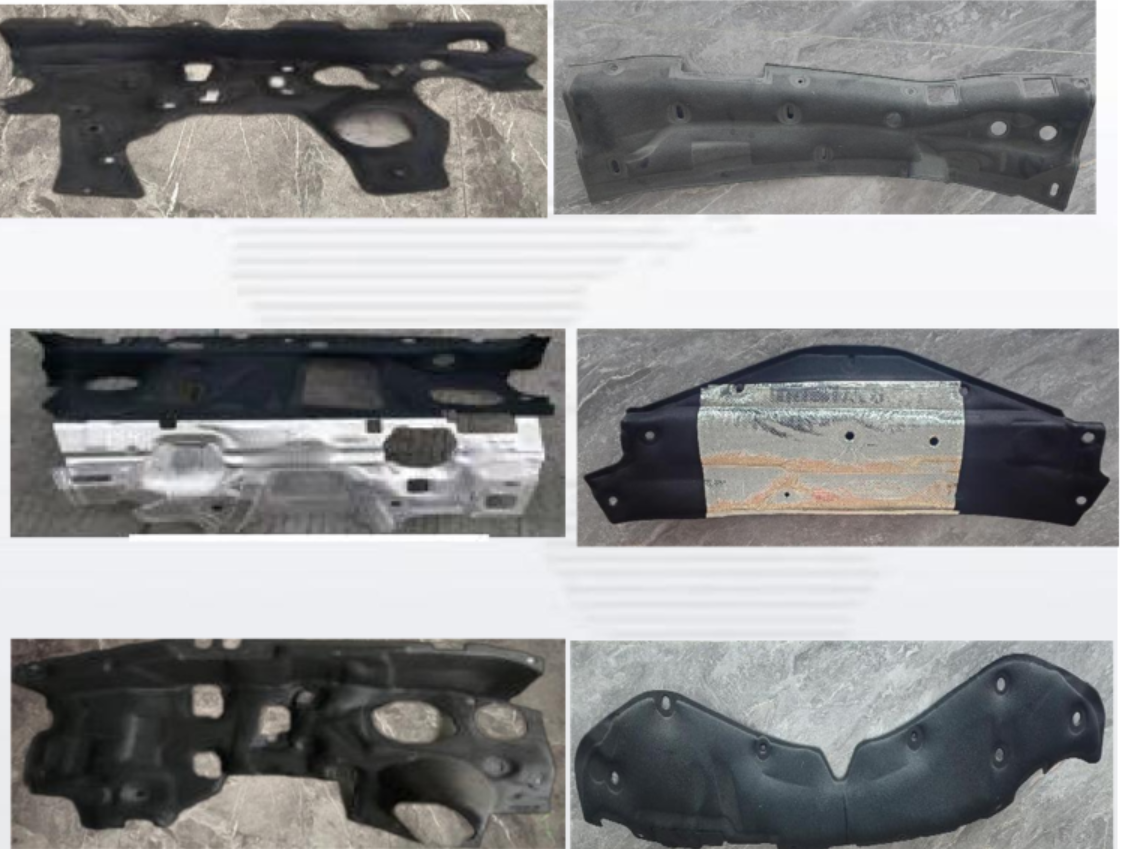
Required Tools:
- Compression Molding Press
Things Needed?
- Nonwoven Fabric (Prepreg)
- Glass Fiber
- Aluminum Foil
Product Manufacturing Process Flow
Step 1: Raw Material Hot Press Forming
The nonwoven fabric (prepreg) and fiberglass are layered in sequence according to process specifications and placed into a Molding Press. Under controlled temperature and pressure, the resin in the prepreg melts, flows, and impregnates the fiberglass reinforcement. After curing under maintained pressure, the layers are tightly bonded to form a composite substrate with excellent mechanical strength and dimensional stability.
Step 2: Aluminum Foil Lamination
The hot-formed substrate is removed and covered with an aluminum foil layer, which is securely bonded to the substrate surface via hot pressing or specialized adhesives. The aluminum foil layer effectively reflects radiant heat, reduces heat transfer, and offers excellent moisture and corrosion resistance – significantly enhancing the product‘s thermal insulation, protection, and service life.
Step 3: Quality Inspection
The cooled and set product undergoes comprehensive quality inspection, including appearance, dimensions, thickness, hardness, and surface quality – ensuring every piece meets customer drawings and technical specifications. Approved parts are cleaned, packaged, and warehoused for delivery.
Headliner Insulator Manufacturing Process
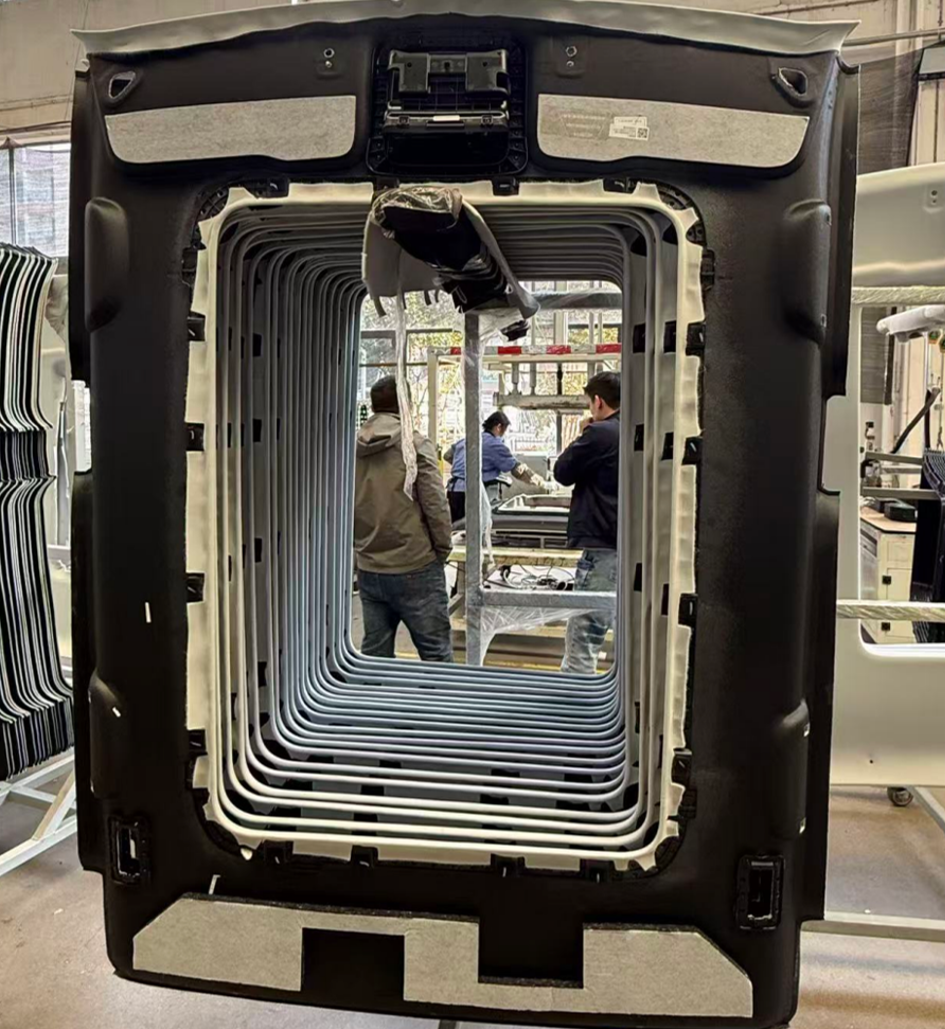
Required Tools:
- Hydraulic Press
- Robotic Arm
- Edge Wrapping Fixture
Things Needed?
- Fabric
- PU Foam / Polyurethane Foam
- Fiberglass Layer
- Nonwoven Bottom Layer
Product Manufacturing Process Flow
Step 1:Material Heating
The fabric, PU foam, fiberglass layer, and nonwoven bottom layer are stacked in sequence according to process specifications and fed into a heating system for uniform heating. The process fully softens the thermoplastic components within the PU foam and activates the resin system in the fiberglass layer – achieving preliminary pre-lamination under combined heat and pressure and preparing the multi-layer stack for subsequent forming.
Step 2: Cooling Forming
The heated multi-layer composite is quickly transferred to a Hydraulic Press and formed under high pressure using dedicated molds. The Hydraulic Press applies precise pressure to ensure uniform lamination of all layers without bubbles or wrinkles. Through the combined action of sustained pressure and the mold cooling system, the material cools and solidifies into a dimensionally stable product blank. A Robotic Arm automates loading and unloading operations, enhancing production efficiency and safety.
Step 3: Water Jet Cutting
The cooled and formed product blank is positioned in a water jet cutting system for precision trimming using high-pressure water jets. The water jet cutting process is controlled by CNC programming, enabling precise cutting of complex contours and mounting holes with smooth, burr-free edges – without creating a heat-affected zone or thermal deformation. Compared to conventional die cutting, water jet cutting is particularly suitable for multi-layer composites, ensuring accurate dimensions and clean edges on every part.
Step 4: Edge Wrapping
The water jet cut product is transferred to an Edge Wrapping Fixture, where the fabric edges are folded over, wrapped, and pressed using specialized equipment – creating a clean, refined appearance that fully covers the edge of the internal materials. The edge wrapping process not only enhances visual appeal and tactile quality but also effectively protects the internal structure edges, improving product durability and service life.
Floor Carpet
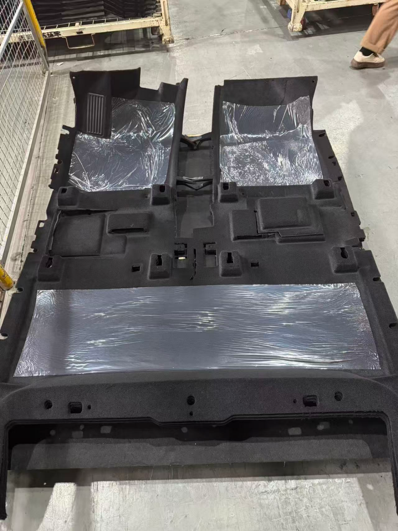
Required Tools:
- Heating Oven
- Hydraulic Press
- Robotic Arm
- Water Jet Cutting Robot
Things Needed?
- Fabric
- PE Layer / Polyethylene Layer
- Rigid Needle-Punched Nonwoven
Product Manufacturing Process Flow
Step 1:Rigid Layer Heating
The rigid needle-punched nonwoven is fed into an Oven and uniformly heated under precisely controlled temperature conditions. The heating process fully softens the thermoplastic fiber components within the rigid nonwoven, achieving the ideal plasticity for subsequent forming – ensuring uniform material flow and complete cavity filling during molding.
Step 2: Cooling Forming
The heated rigid needle-punched nonwoven, together with the fabric and PE layer, are stacked in sequence and quickly transferred to a Hydraulic Press for high-pressure forming and cooling using dedicated molds. Under the combined effect of heat and pressure, all layers are tightly bonded and integrally formed. The mold cooling system rapidly cools and solidifies the product, ensuring dimensional stability and precise shape. A Robotic Arm automates loading and unloading operations, enhancing production efficiency and safety.
Step 3: Water Jet Cutting
The cooled and formed product is placed on the worktable of a Water Jet Cutting Robot for precision trimming using CNC-controlled high-pressure water jets. The Water Jet Cutting Robot accurately cuts complex contours and mounting holes with smooth, burr-free edges – without creating a heat-affected zone or causing thermal deformation and delamination. This process is particularly suitable for precision cutting of multi-layer composites, ensuring accurate dimensions and clean edges on every part.
Step 4:Accessory Installation
The water jet cut product is transferred to an assembly station where various accessories are installed according to customer drawings – including but not limited to clips, brackets, locating pins, and hook-and-loop fasteners. All accessories are positioned using dedicated fixtures to ensure accurate placement and secure attachment. Upon completion, a final comprehensive inspection is conducted to verify that all accessories are correctly installed and that product appearance and functionality meet all requirements.